This article aims to provide you with a comprehensive overview of the Tasks section of the Task Plan and its features.
|
Skip Ahead to: |
Overview
The Tasks section or tab displays a list of tasks available in the Task Plan. From this section, you can add, modify, or delete tasks, assign resources, and log time against them, among other tasks. The toolbar features/options that you see will depend on the task mode you are in, either Checked-In or Checked-Out.
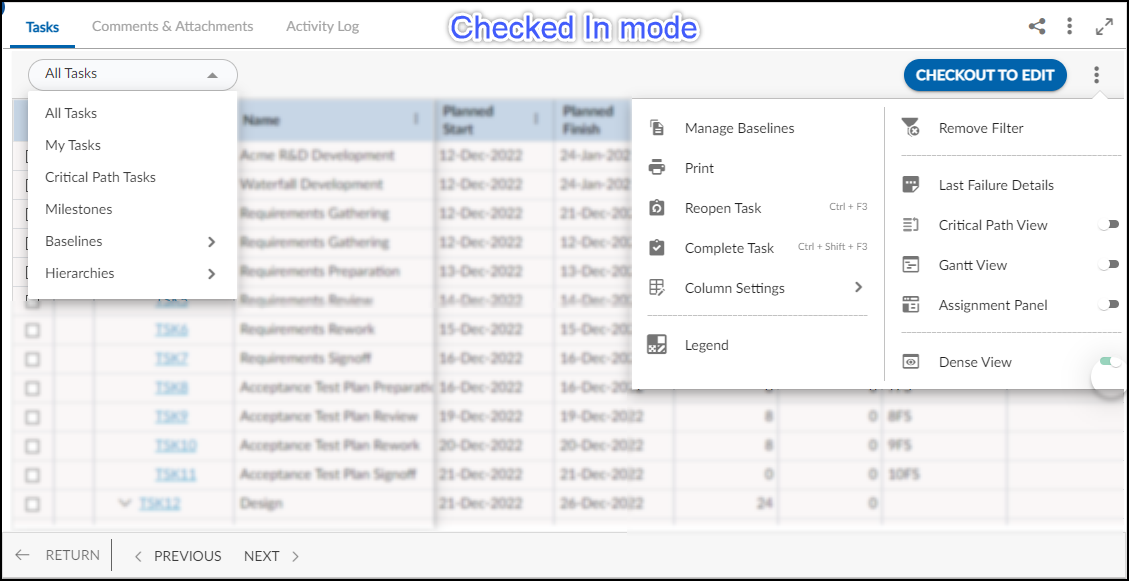
In Checked-In mode, you cannot add, edit, or update tasks. However, you can perform other operations such as reopening or completing tasks. More features are also available in the More Options menu.
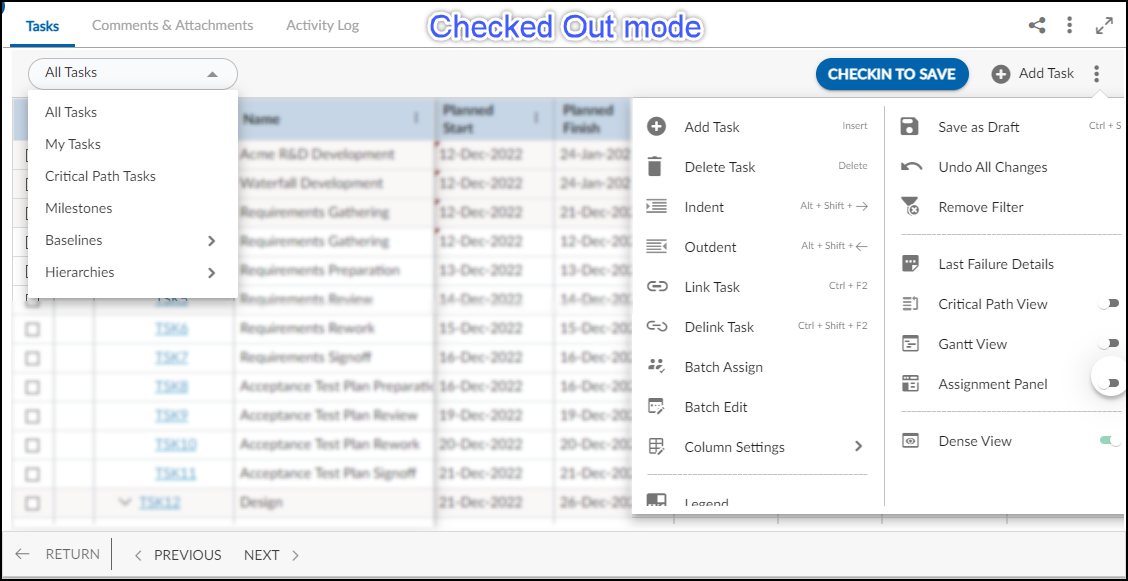
In Checked-Out mode, you have the ability to add, edit, update, and save your tasks. Once you have finished making changes, you can save your tasks by clicking the CHECKIN TO SAVE button
Notes:
- Inactive team members are prefixed with “ZZ~” and displayed at the end of the list when the project is checked out. Similarly, inactive activity codes, master lists, and Dynamic Content Keys (DCK) are prefixed with “~” and displayed at the end of the list.
- You can invite team members even for a project that is already checked out.
Tasks Section Features
The Tasks section provides a wide range of features/options for effectively managing tasks in the All Tasks dropdown menu and the More Options menu, as shown in the screenshot below.
Note: Some of the options may not be available depending on the task mode, and the scheduling type selected when creating the task plan.

All Tasks
It displays all tasks available in the task plan, and it is the default view.
My Tasks
It displays tasks for the logged-in user only, including tasks created by that user and tasks to which the user is assigned.
Critical Path Tasks
It displays critical tasks that may cause delays in timely project completion, and it is only available if you have selected Advanced scheduling. Learn more about it here.
Milestones
It enables you to view all the milestone tasks in the task plan. Learn more about it here.
Baselines
The Baselines view shows the baseline tasks only. Once you select this option, you are asked to select the baseline level that you want to see.
Manage Baselines: Saving baseline task information is crucial for tracking and analyzing a project’s progress, allowing for meaningful comparison between the initial plan and current status. Learn more about it here.
Hierarchies
The Hierarchy view enables you to visualize the structure of tasks in a hierarchical format. Upon selecting this option, you will be prompted to choose the specific hierarchy level that you wish to view. Depending on the hierarchy level selected in the “All Task” drop-down menu, the task list will be displayed in the corresponding format. Learn more
Add Task
It allows you to add a new task. Learn more about it here.
Delete Task
It allows you to delete the tasks. Select tasks to delete and remove from the task plan. Learn more about it here.
Indent
Indent a selected task to make it a sub-task of the immediate preceding sibling task. Learn more about it here.
Outdent
Outdent the selected task to make it the summary task of all the subsequent sibling tasks. Learn more about it here.
Link Task
Establish a connection between tasks by setting a dependency between the start and finish dates of two tasks. To link tasks, you can select the tasks you want to link and choose Link Task from the More Options menu.
Delink Task
Remove the connection between tasks and remove their dependency. To delink tasks, you can select the tasks you want to link and choose DeLink Task from the More Options menu.
Batch Assign
It let you assign resources or edit specific fields for batches of tasks. Select batches of tasks and assign resources. Learn more about it here.
Batch Edit
Batch editing enables you to quickly apply the same changes to many tasks in a task at the same time without having to edit each one individually. Learn more about it here.
Column Settings
You can set the columns in the Task List view so that the Task Plan view displays the required columns. Drag and drop columns to resequence the columns, set the column width to view maximum columns, and set the hierarchy level. Learn more about it here.
Note: The columns are listed based on the selected scheduling type when creating a task plan.
Legend
The legend feature allows you to easily identify the various icon types displayed in the Gantt View.
Save as Draft
It will save the changes done in the CHECKOUT TO EDIT mode as a draft. The changes will be visible to other users once you check the task plan.
Undo All Changes
It discards the saved changes you made to the plan and retains the earlier plan. Click the Undo All Changes option under the More Options icon, if you want to check in the project without saving the modifications to the plan. If there are no discrepancies, a confirmation message is displayed on successful check-in. See Customize the CHECKOUT TO EDIT view section to customize the view for Task Scheduling.
Remove Filter
It removes the filter criteria and the specific view applied to the task plan. To remove all the applied filters and view all workitems, click the More Options icon and select the Remove Filter option.
Last Failure Details
You can view the details of the previous failure check-in.
Critical Path View
It shows the critical path having critical tasks in it that can cause delays in the project’s timely completion. Learn more about it here.
Gantt View
You can view the task progress in the Gantt Bar Chart corresponding to the Tasks List View for tasks in the Task Plan form. The Gantt Chart can be viewed on a scale of Quarterly, Monthly, or Yearly periods by right-clicking the Taskbar. Learn more about it here.
Assignment Panel
View the selected task’s resource assignment in the Task Assignment Panel. Learn more about it here.
Dense View
This option shrinks the rows and columns of tasks so that more task records can be viewed on the screen.
Other Options
There are some other options in Task such as Print, Reopen Task and Complete Task in the checked-in mode that help you manage the tasks.
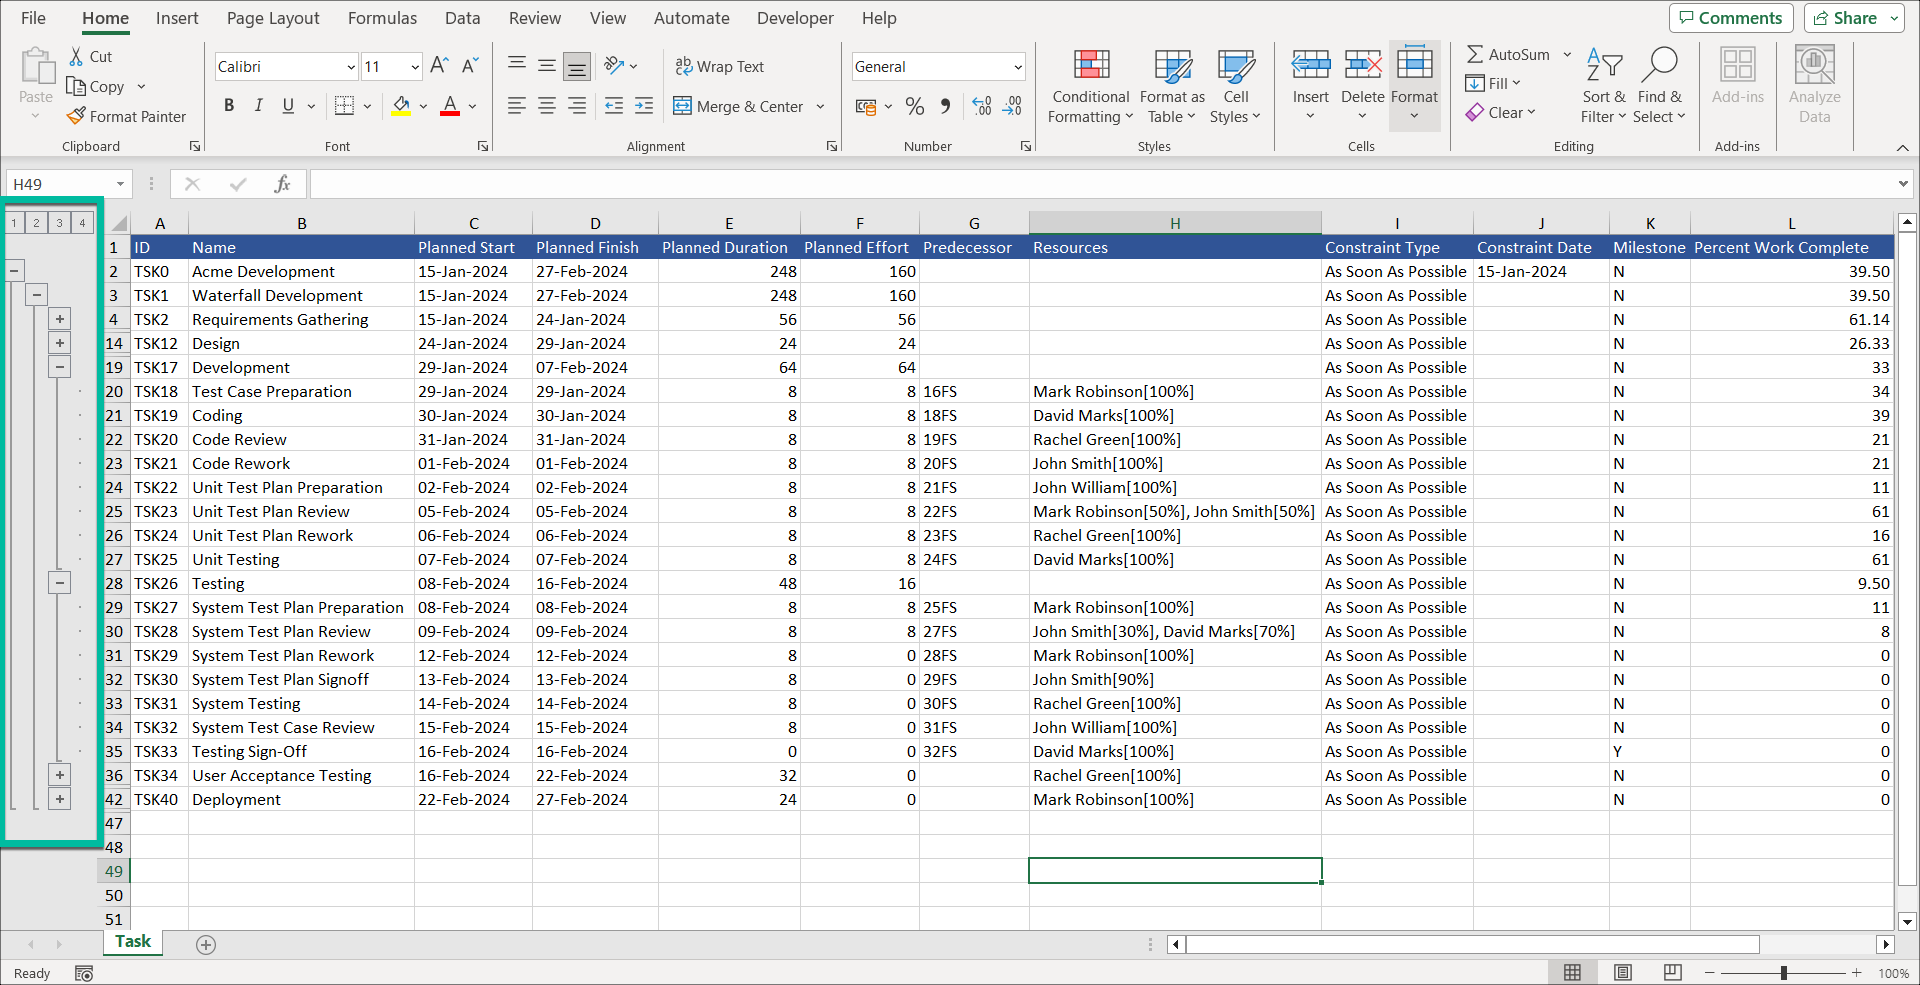
Print – It allows you to print out task details and even email them to other project members or external stakeholders. You can download the task details using the Print action in the PDF, RTF, CSV, and XLS format. Whereas the PDF, CSV and RTF formats provide all the necessary Task details, the XLS format also reflects the Task hierarchy as seen in the application.

Reopen – It allows you to reopen a previously closed task, which can be particularly helpful when additional updates or changes are needed or timesheet entry for a closed task.
Complete Task – It allows you to mark a task as complete or closed by selecting at least one, which can help keep track of progress and ensure that tasks are appropriately managed.
Reposition Tasks
Managing tasks efficiently involves repositioning them within your task plan. You can drag and drop multiple tasks simultaneously, making task arrangements faster and more intuitive. When you move multiple tasks, any necessary scheduling adjustments are automatically applied, ensuring that summary task dates update to reflect the new positions of subtasks (if applicable).
To reposition tasks, select the tasks you want to move and drag them to the desired position.
However, certain conditions may restrict these repositioning actions, resulting in error messages. To learn more about the failure details, click here.

