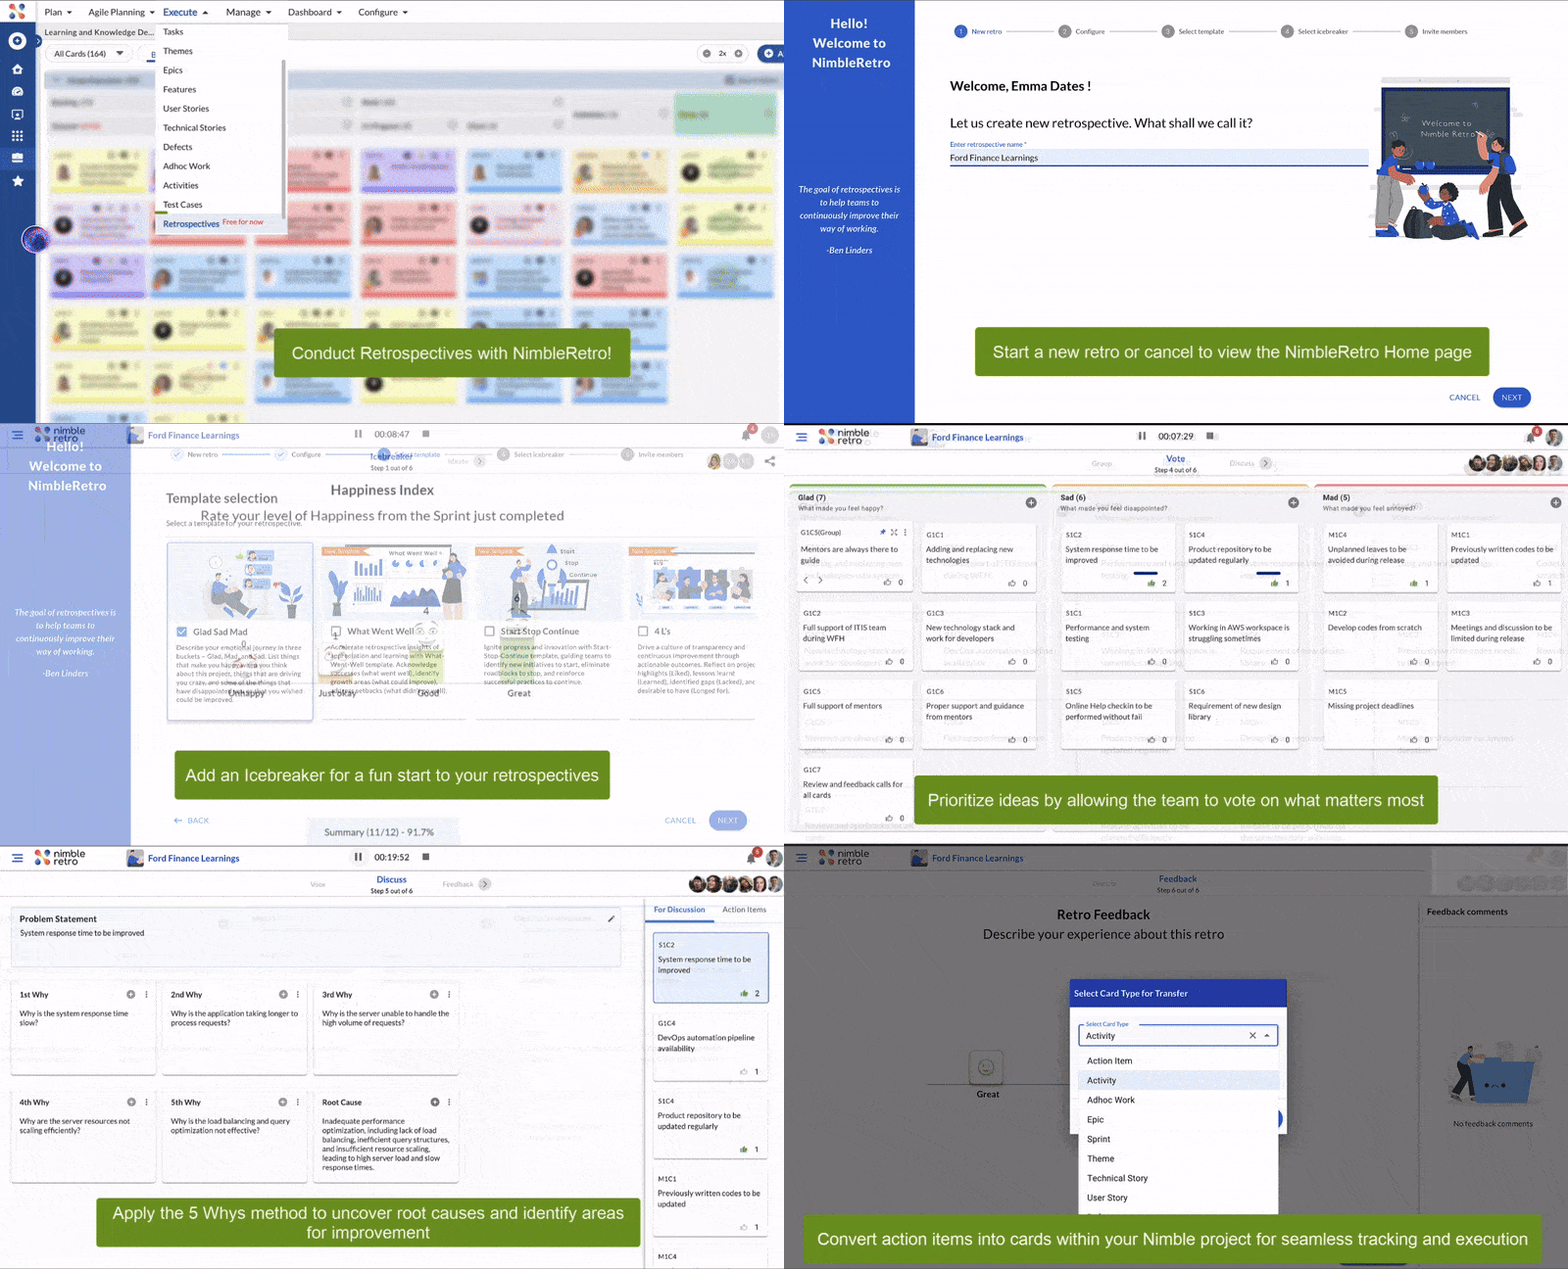
The FAQs page handles the most common questions about NimbleRetro. The questions are grouped under various categories.
Signup Process
- How to sign up for NimbleRetro?
- How to schedule a retrospective meeting?
- How to invite contributors/facilitators to NimbleRetro?
- How to select a template for retrospectives?
- How many templates are available?
- What are the different templates available?
- How to start without an Icebreaker?
- How to create a new retro?
User Profile
- How can I change my password?
- What if I forgot my password?
- How do I add a picture to my profile?
- Can I receive notifications for retrospectives that I am a part of?
- Where can I find help documents?
Retrospective Process
- How to edit the Retrospective duration for each step?
- What will happen if I click on Start Retrospective?
- How to move from the Icebreaker step to the Ideate step?
- What happens if I pause the timer?
- How to stop the timer at any step of a retrospective process?
- Is it possible to add cards in the Ideate step?
- How to know how a card has already been voted?
- Is it possible to drag and drop cards in the Group step?
- Can I edit the problem statement?
- What does the + icon denote on the profile pic above the Member’s panel?
- What is a root cause and how to add it in the Discuss step?
Workboard
- How to assign a card owner to a card?
- How to view my Action items?
- How to view all Action Items?
- How to block a card on the Workboard?
- How to unblock a card on Workboard?
- How to archive a card on Workboard?
- How to move cards on the Workboard?
Convert to Enterprise Account
- How do I convert my account to an Enterprise account?
- What additional features are available after converting to an Enterprise account?
- How do I invite users to my enterprise?
- What happens to users with a different domain name from my enterprise?
Signup Process
- How to sign up for NimbleRetro?
In the Sign-up screen, enter the details like First Name, Last name, company email, etc., and set a password. Confirm password and set Timezone. Then, click the NEXT button. In the New Retro screen, enter a name for your retrospective. If you want to schedule a retro for a later hour, then toggle the toggle Schedule for a later date or time. Select an appropriate date and time for the upcoming retrospective and click the NEXT button. In the Select Template screen, choose a suitable template and click the NEXT button to move to the Icebreaker step. Here, you can select a suitable Icebreaker question for your retrospective. Otherwise, you can directly start with the retrospective process using the Continue without Icebreaker checkbox. Lastly, in the Invite members screen, enter the email addresses of the members you want to invite as contributors as well as facilitators for the retrospective.
- How to schedule a retrospective meeting?
In the New Retro screen, enter the name of the retro and toggle the Schedule for a later date or time toggle. Select an appropriate date and time for the upcoming retrospective. Click the NEXT button to schedule a meeting for a later date.
- How to invite contributors/facilitators to NimbleRetro?
From the Invite members screen, enter the email address of the members and press Enter whom you want to invite as contributors as well as facilitators for the retrospective. You can invite multiple contributors and facilitators to the meeting.
- How to select a template for retrospectives?
In the Select template screen, you can choose the preferable template from the list like Glad, Sad, and Mad. Then, click the NEXT button to move ahead.
- How many templates are available?
In the Select template screen, there are four different templates available in NimbleRetro.
- What are the different templates available?
The four different templates available in NimbleRetro are Glad Sad Mad, What Went Well, Start Stop Continue and Liked, Learned, Lacked, and Longed For.
- How to start without an Icebreaker?
In the Select Icebreaker screen, you can choose the Icebreaker question or you can start your retrospective without an Icebreaker question. For that, the tick marks the Continue without Icebreaker checkbox to move ahead.
- How to create a new retro?
To create a new retro, navigate to the left navigation panel and click the NEW RETRO button. Then, enter the retrospective name and schedule it. Enter all the details and complete the process by inviting members as contributors and facilitators.
User Profile
- How can I change my password?
From the User Profile panel, click the Change Password icon. Here, enter the Old password that you remember. Then, enter the New password and Confirm the new password. Click the UPDATE button to update your password. Note: The password can be an alphanumeric containing a minimum of eight characters and a maximum of 20 characters.
- What if I forgot my password?
In case you forgot your account password and are unable to login. Then, click Forgot Password link. In the Password restore screen, enter the registered Login ID. Click the SUBMIT button and an email will be sent to your linked account to change the password.
- How do I add a picture to my profile?
When you sign-up for the first time for NimbleRetro the Change Profile Photo popup appears. Click on UPLOAD PHOTO and browse to select the required image from your computer. You can also drag and drop an image file and Click the SAVE button.
- Can I receive notifications for activities in projects that I am a part of?
Yes, in the Notifications panel(bell icon), you will receive notifications for access rights as a facilitator or contributor. Also, you get notified when an action item is assigned to you.
- Where can I find help documents?
To navigate to Help documents, go to the left navigation panel, here go to the Help section in the bottom left corner.
Retrospective Process
- How to edit the Retrospective duration for each step?
In the Retrospective Settings, the first setting is to Set the time for retrospective steps. The facilitator can change the default values as per their requirements using the up and down arrows for each step. Once done, click the NEXT button.
- What will happen if I click on Start Retrospective?
After the Retrospective Settings screen, the facilitator will click the START RETROSPECTIVE button. With that, the retrospective process will begin for all the members.
- How to move from the Icebreaker step to the Ideate step?
To move from the Icebreaker step to the Ideate step, the facilitator can stop the timer and then the Ideate step gets activated. Then, click on the Ideate step and you are easily moved to the Ideate step.
- What happens if I pause the timer?
The facilitator can only pause or stop the timer as per his requirements. On pausing the timer, the timer will get stopped but the members can add their responses meanwhile.
- How to stop the timer at any step of a retrospective process?
The facilitator can click the Stop icon and the timer will get stopped at 00:00:00.
- Is it possible to add cards in the Ideate step?
Yes, members and facilitators can add cards in the desired column by clicking the Add icon of the respective column.
- How to know how a card has already been voted?
If a card has already been voted then you can see a green colored Thumbs up icon with the count of votes added to it.
- Is it possible to drag and drop cards in the Group step?
Yes, the facilitator can drag and drop similar cards to add them to a group. Note: You can group cards of the same column only. Cards cannot be dragged from one column to another.
- Can I edit the problem statement?
In the Discuss step, the facilitator can edit the Problem statement by clicking on the Edit icon of the problem statement on the right.
- What does the + icon denote on the profile pic above the Member’s panel?
The + icon beside the profile pictures of the members denotes the count of other members in the retrospective. For example, if it is +10 then it denotes that there are 10 more members in the retrospective.
- What is a root cause and how to add it in the Discuss step?
The root cause refers to an underlying reason that contributed to the problem statement during a retrospective session. To add a root cause in the Discuss step, add any one Why or all the 5 Whys, then from the Overflow menu click the √ Add root cause icon to help members identify the primary cause behind it.
Workboard
- How to assign a card owner to a card?
On the Workboard, click the ADD button to add a card. In the Assign Card option, select the names of the respective card owners you can search with their names. Then, click the ASSIGN button. You can also select multiple owners for a card from the list of available users.
- How to view my Action items?
On both the views the Workboard List view and Board view, click the All Action items drop-down. Here, select My action items to view the action items that are assigned and added by you only.
- How to view all Action Items?
On both the views the Workboard List view and Board view, click the All Action items drop-down. Here, select All action items to view the action items assigned to all the members. This helps you to know the current state of each action item.
- How to block a card on the Workboard?
If you face any bottlenecks then you can perform block card operation. Click the More Options icon on the card and then select the Block Card option. Then, select the blocking reason add blocking comments on the card, and click the SAVE button. The car will be blocked on the Workboard.
- How to unblock a card on Workboard?
To unblock a blocked card, click the Block icon on the card, enter the mandatory comment, and click the SAVE button. Note: You cannot edit or move a blocked card.
- How to archive a card on Workboard?
On the List View/Board View of Workboard, select the card you want to archive from the last lane on the board to indicate that the work has been completed. Click the More Options icon on the card and then select the Archive Card option.
As work progresses, you can simply drag and drop cards from ToDo to the Done column of the Workboard.
Convert to Enterprise Account
- How do I convert my account to an Enterprise account?
- Navigate to your user profile and expand the options.
- Select Convert to Enterprise Account.
- Click the GET STARTED button in the Upgrade to Enterprise window.
- Enter your company email address and a unique enterprise name.
- Click Submit to complete the upgrade.
You can use the User Management screen to invite more users, modify user access rights, and manage user accounts (lock/unlock users).
- Access the User Management screen by clicking the Enterprise name on the left panel.
- Click the INVITE USER button.
- Select the persona (Admin or Team Member) for the invitee.
- Enter the email addresses of the users to invite.
- Click INVITE. An email will be sent to the invitees.
Users with a different domain name won’t be transferred and their names displayed with a tilde (~) sign. Their action items will be reassigned to the enterprise Admin.