
|
Skip Ahead to: The Layout of NimbleRetro Home Page How to Create Custom Templates |
Overview
The Retrospectives module in Nimble is a powerful feature under the Execute menu, designed to empower teams to reflect on past iterations, identify areas of improvement, and take actionable steps for continuous growth. Retrospectives are available to all user roles in public SAAS customer accounts by default. This module ensures seamless access for every project member. With its structured stages and customizable templates, NimbleRetro facilitates effective retrospectives that lead to actionable outcomes.
Important Notes Related to Access Control
- The Retrospectives module is available only to our Public SaaS customers.
- Upon upgrade to Release 7.15, all users will gain access to the Retrospectives module by default.
- Team members invited to retrospectives are limited to the participants in the specific Nimble project from which the retrospective is created.
Navigation

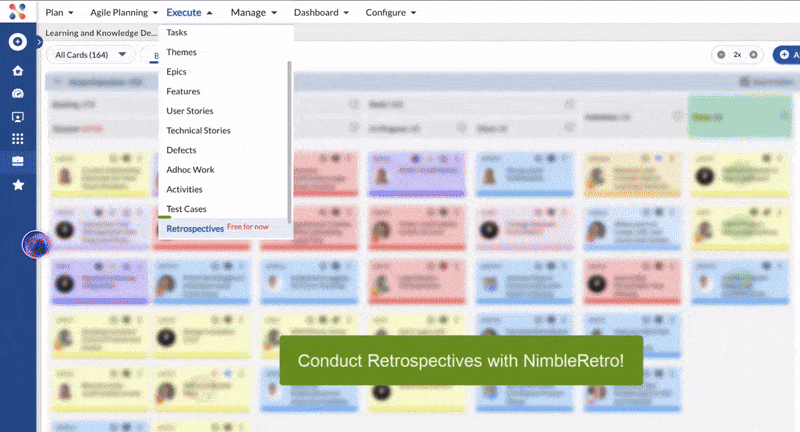
- Go to the Execute Menu of your project.
- Click on Retrospectives.
- A new window opens, allowing you to create a new retro or click Cancel to navigate to the NimbleRetro Home page.
- If an ongoing retrospective is in progress, you will be directly taken to the current stage (e.g., the Ideate stage).
The Layout of the NimbleRetro Home Page
Upon accessing NimbleRetro, you will land on the Home Page, which is divided into the following sections:

Left Panel
- Home: Navigate back to the Home Page.
- Custom Templates: View and manage all your custom templates.
Main Screen
- Displays a listing of all retrospectives created to date.
- Shows the latest 5 retrospectives by default, with an option to click View All to see older retrospectives.
- Ongoing retrospectives, if any, are prominently highlighted.
Top-Right Corner
- User Profile: Access user settings and account details.
How to Create Custom Templates
To create a custom template follow these steps:

- Click the Custom Templates button from the left panel.
- In the Create Custom template window, define the custom template details such as the Template name and description that best defines the retrospective template.

- Next, fill in the column details like the Column name and description.
Note: A maximum of 4 columns can be added. - Once done, you can assign colors to differentiate the different columns.
- Then, click the SAVE TEMPLATE button to save your custom template. Now, you can use the template for the future.

How to Conduct Retrospectives as a Facilitator
Starting a Retrospective:
- Click Create New Retro on the NimbleRetro Home page.
- Name the retrospective.
 3. Choose to:
- Start a new retro from scratch, or
- Start a new retro using an existing retro.
4. Select a template (e.g., Glad-Sad-Mad, Start-Stop-Continue, 4Ls, or a custom template).
5. Configure additional settings, such as:
- Setting an Icebreaker.
- Inviting team members.
- Defining the timeline for each stage.
Example Walkthrough
Let’s say you are conducting a retrospective for a sprint that just ended, using the Glad-Sad-Mad template:
- Step 1: Name the Retrospective: “Sprint 10 Retrospective – Team Alpha.”
- Step 2: Configure Settings: Set an Icebreaker like “What’s one thing that made you smile this sprint?” Invite all project team members and allocate 10 minutes for the Ideate stage, 5 minutes for Grouping, and 15 minutes for Discussion.

- Step 3: Ideate Stage: Participants add their feedback to the Glad-Sad-Mad columns, such as:
- Glad: “We completed the feature ahead of time.”
- Sad: “There were too many last-minute changes.”
- Mad: “The server outage delayed testing.”

- Step 4: Group Stage: As the facilitator, group similar cards, such as combining “server outage” feedback into one category.
- Step 5: Vote Stage: Team members vote on the most critical topics to discuss. For example, “server outage” gets the most votes.

- Step 6: Discuss Stage: Select “server outage” as the problem statement and use the 5 Whys method to analyze the root cause. For instance:
- Why 1: Why did the server outage occur? – “Insufficient monitoring.”
- Why 2: Why was monitoring insufficient? – “No dedicated resource for monitoring.”
- Continue until the root cause is identified.

- Step 7: Action Items: Based on the 5 Whys discussion, create actionable tasks, such as “Set up automated server monitoring” and assign it to John, and “Create a backup server plan” assigned to Sarah. You can create these tasks by clicking the Add Action Item button during this stage.
Completing the Retrospective:
- Move from the Discuss stage to the Feedback stage.
- In the Feedback stage, select a card type (e.g., User Stories) from the dropdown to transfer the action items to Nimble.

- Collect feedback from participants about the retrospective process.
- Once done, the facilitator can click Finish Retro to close the retrospective.

Participants’ Role in Retrospectives
- Contribute Ideas: Add thoughts and feedback during the Ideate stage.
- Vote: Prioritize cards for discussion during the Vote stage.
- Collaborate: Actively participate in discussions and root cause analysis.
- Provide Feedback: Share insights on the retrospective process during the Feedback stage.
Once set, you’re ready to start capturing insights with your team.