In this article, we will help you understand how to update user status as Active or Inactive.
|
Skip Ahead to: |
Overview
Many a time, you would want to deactivate a user in your app account as due to various reasons, the user might no longer be contributing to the work and not anymore required to be active in the account. Earlier, for such users, you had no other choice but to delete them to accommodate more users to your account. But now, you can just inactivate the user and free up the count of licensed users. The inactivated users will have no access to the app account but will not be deleted from the account. So, any time you want to re-activate that same user, you can do that from the application itself and restore all his or her previous access at the Organization and Board level.
Let us now understand how can we inactivate or activate a user and what are the post-inactivation and post-reactivation impacts.
Prerequisites
To inactivate or reactivate a user, you must have Admin access at the Organization (Org.) level.
Steps to Inactivate a User
To inactivate a user, as an Admin, perform the following steps:
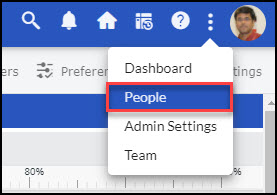
- From the More Options menu, go to the People option.
2. On the People page, you can perform any of the following steps to inactivate a user:
-
- Select the user from the list and click the Update User Status
 icon from the side toolbar.
Note: You can inactivate only one user at a time. - Select the user from the list and click the View icon from the side toolbar. On the View Profile page, click the Update User Status icon from the side toolbar.
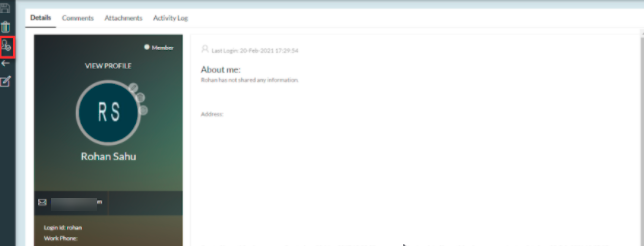
- Select the user from the list and click the Edit icon from the side toolbar. On the Edit Profile page, click the Update User Status icon from the side toolbar.
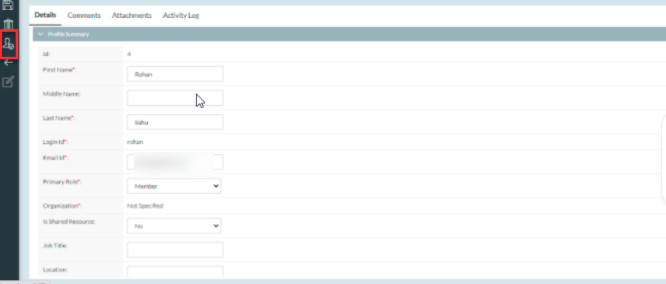
- Select the user from the list and click the Update User Status
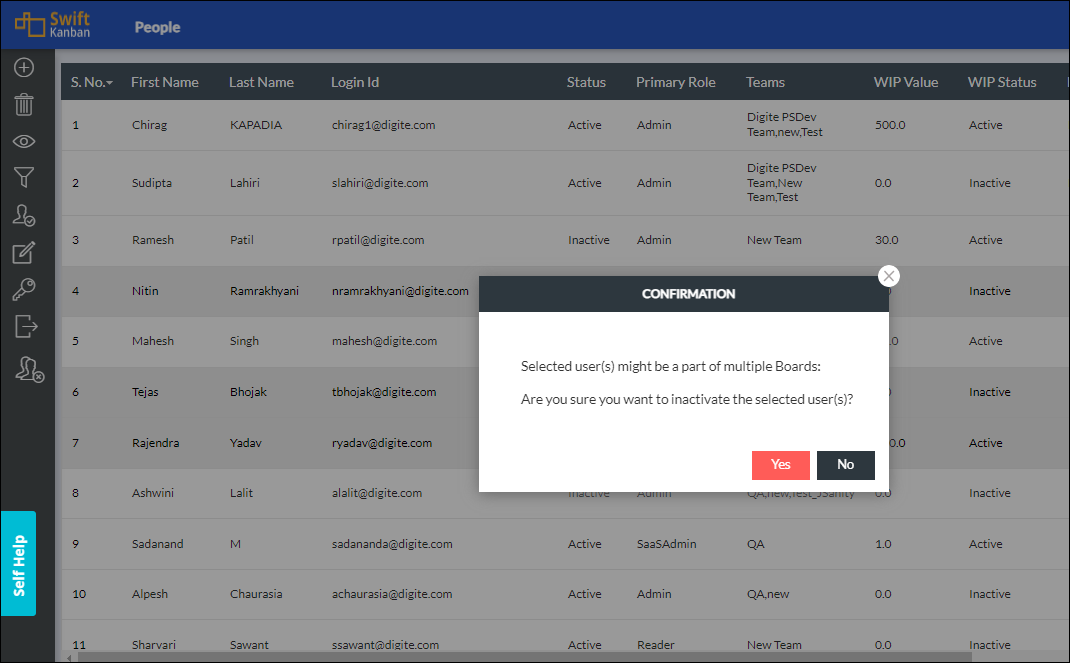
- Once you click the Update User Status icon, it displays the confirmation message informing the list of the Boards that the user is part of. To confirm the inactivation, click Yes.
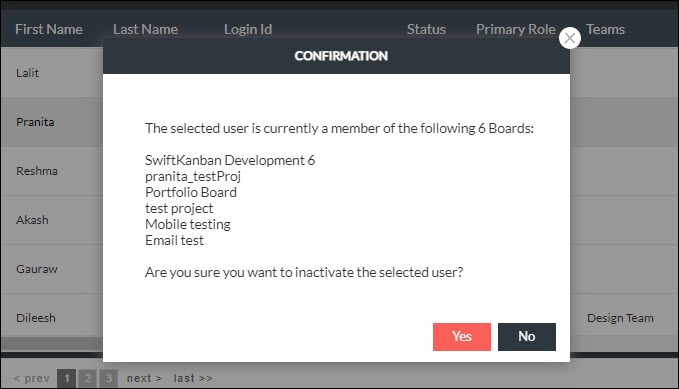
- The user is now inactivated and will no longer be able to exercise his or her previous access to the application.
Important Points to Consider
When a user is inactivated, there will be certain impacts on the user roles and other accesses. Let us understand those impacts:
User Roles
- Any such user will be shown as Inactive under the Status column on the Admin > People page. The Status column will be in read-only mode, so the status of the user cannot be edited from that column. But, the same can be filtered and will also be included when you export data from the People page.
- Any such user will also be shown as Inactive under the Status column on the Kanban Board > Team Member page. The Status column will be in read-only mode, so the status of the user cannot be edited from that column. The information about the user status will also be included when you export data from the Team Member page.
- You cannot inactivate or reactivate more than one user at a time from the Admin > People page.
- There must be at least one user each having the primary role of Admin and Integration user in an app account. If a user is the lone Manager of a Board, then that user cannot be inactivated because there has to be at least one Board Manager on a Board.
- Only Admin can edit the details of an inactive user.
- The Board Manager cannot invite an inactive user to the Board.
A user with the same login ID as an inactive user cannot be created for an app account. Note the first name, and the last name can be the same as an inactive user, but the login id should be unique across all the app accounts and the email id should be unique in a particular app account.
Once a user is inactivated, he or she will not be allowed to log in to the application via the user interface or via any method like rest/soap API, mobile app, SSO, LDAP, Google SignIn, or Facebook Sign-in.
Card Operation
- When the card owner is an inactive user, then while changing the ownership of that card by clicking the display picture the list will show that inactive user and all other active users who are part of the Board. Once another active user is re-assigned to that card, the original owner, who is an inactive user will no longer be shown in the list. The same is also applicable for a To-Do owner who is an inactive user.
- A card cannot be assigned to an inactive user by using any external method like web service (REST API or SOAP) or e-mail or via any other integrated tool like Zapier, Slack, or MS Teams.
- A card cannot be assigned to an inactive user by using any external tool integrated with SwiftKanban like Zapier, Slack, and MS Teams.
-
- The inactive user will be shown with a Tilda sign in the Analytics and Reports like the Timesheet Report, Card Data Analyzer, Flag Data Analyzer, Tag Clouds, and so on.
Steps to Reactivate a User
To reactivate a user, as an Org. Admin, perform the following steps:
- From the Admin menu, navigate to the People option.
- On the People page, you can perform any of the following steps to reactivate a user:
- Select the inactive user from the list and click the Update User Status icon
 from the side toolbar.
Note: You can reactivate only one user at a time. - Select the user and click the View icon from the side toolbar. On the View Profile page, click the Update User Status icon
 from the side toolbar.
 - Select the user and click the Edit icon from the side toolbar. On the Edit Profile page, click the Update User Status icon
 from the side toolbar.
- Select the inactive user from the list and click the Update User Status icon
- Once you click the Update User Status icon, it displays the confirmation message. To confirm the reactivation, click Yes.
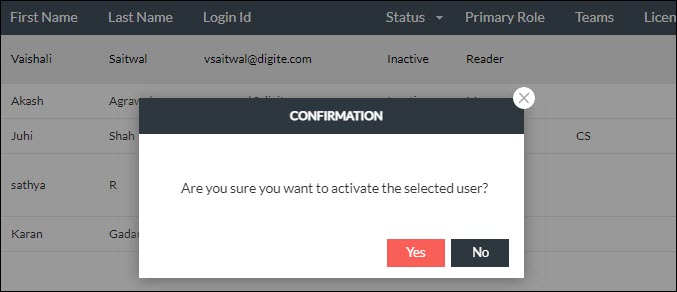
- The user is now activated and will get back the previous access to the application. To know more about the restored access, see the following section.
Important Points to Consider
When a user is reactivated, there will be certain impacts on the user roles and other accesses. Let us understand those impacts:
- On reactivating a user, the system will check whether the app account has already exhausted its number of licenses. If so, then the user will not be reactivated and an error message will be displayed informing the same.
Note: While calculating the total number of user licenses, the existing inactivated users will not be considered. - Similarly, while reactivating a user, if any of the add-on licenses (ESP, Story Mapping, Agile Program Management) to which the user previously had access, have already been exhausted, then the user will not be granted access to them. As an example, a reactivated user may get Board Manager access, but may not get access to ESP or Story Mapping. The same will be notified to the user via an informational message.
- Once reactivated the user will get back access to all the Boards that he or she was previously part of, provided the above conditions are met.
Steps to Inactivate Multiple Users
To inactivate multiple users, as an Admin/Reader, perform the following steps:
- From the More Options menu, go to the People option.
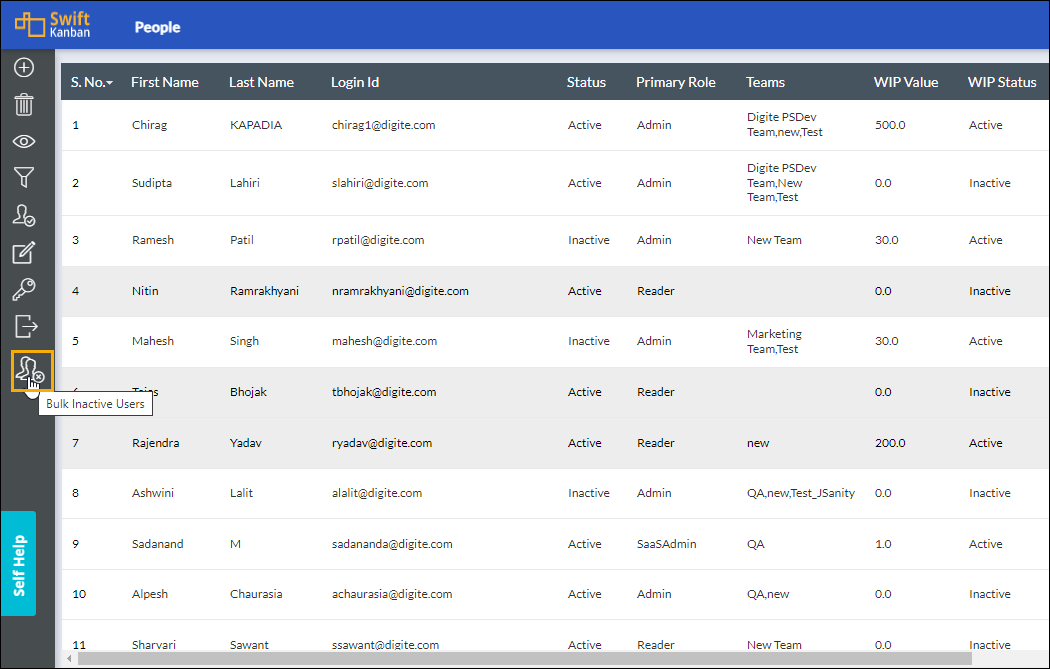
- On the People listing page, ctrl-click and select the users that you want to change status from active to inactive.
3. From the side toolbar, click the Bulk Inactive Users icon to change the status of multiple users to inactive at a time.
4. Next, confirm to inactivate the users.
Important Points to Consider:
- The Integration user can’t be made inactive.
- If a user is inactive, they stay inactive. Use the Update User Status option to activate the user.
- Boards made by inactive users won’t get deleted.
- To use the Bulk Inactive Users option, there must be at least one active admin in the account.

